Repair Kit

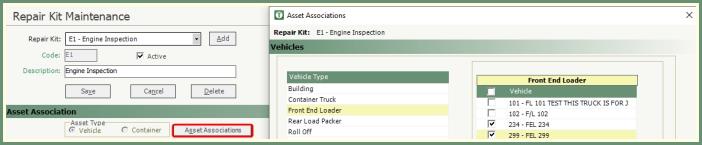
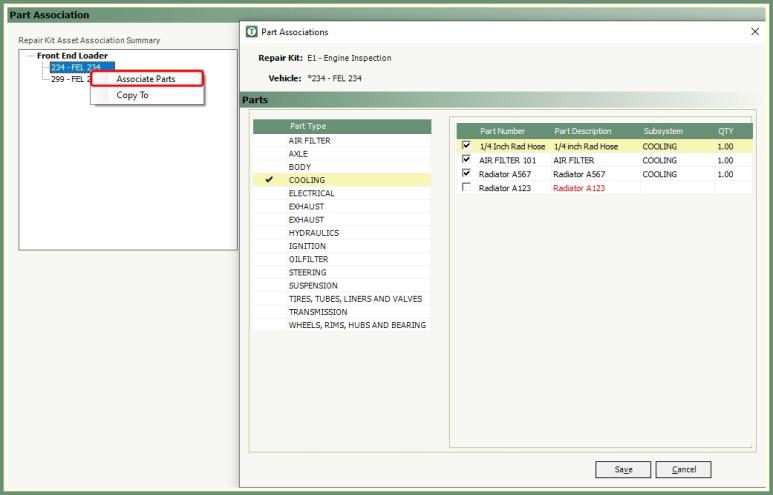
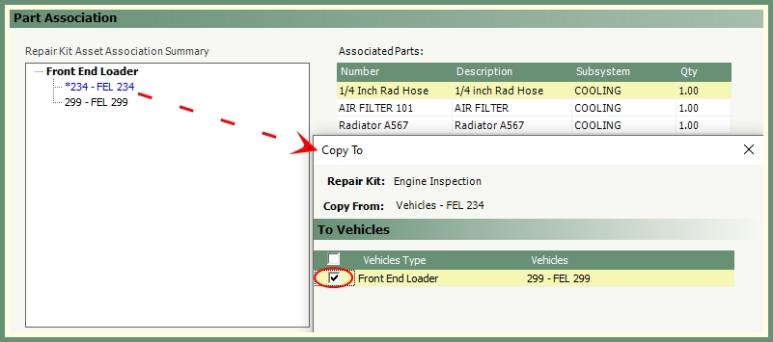
Pre-populate specific parts on a repair kit to be used during routine repair orders for specific asset types to reduce repair order entry time by eliminating the need for the user to enter each part individually.


Add Repair Kit


  1. Click Add to create a New Repair Kit

  2. Enter a unique 2-digit Code.

  3. Enter a Kit Description. Such as: Brake Service, Oil Change.

  4. Click Save.

  5. Select an Asset Type: Vehicle or Container.

  6. Click Asset Associations.

  1. Select the vehicle types and vehicles that you would like to include as part of the Repair Kit.

  2. Proceed to Part Association.


Associate Parts To A Vehicle


  1. Select a Vehicle by left clicking once to highlight.

  • If part associations do not exist, a message will appear to the right of the vehicle.

    .

  1. Right Click on the Vehicle and select Associate Parts.

  2. Left click once on a Part Type to highlight.

  3. Add a check-mark to a part to associate.

  4. Select a Subsystem.

  5. Enter a Quantity.

  6. Repeat for all parts to associate with this vehicle on this repair kit.

  7. Click Save.

  • Once Parts have been associated you will see an asterisk appear beside the vehicle number.

Copy Repair Kit To Other Vehicles


Once a Repair Kit for a particular vehicle has been created, you can copy the linked parts to one or multiple vehicles that share those same parts.


Example: Vehicle #234 has linked Air Filter , Radiator A567 and 1/4 inch Rad Hose as part of the Repair Kit.

  • If 1 or more other vehicles share the same parts rather than manually associating the parts to each vehicle, the user can copy the associated parts to other vehicles.


  1. Right click on the vehicle to copy associated parts From.

  2. Select Copy To.

  3. Select the Vehicle(s) to copy associated parts To.

  4. Click Save.


Where To Use Repair Kits


Repair Order

  1. Select a Repair Kit from the drop down.

  2. Click Add.

  3. The associated parts will populate the Parts grid.


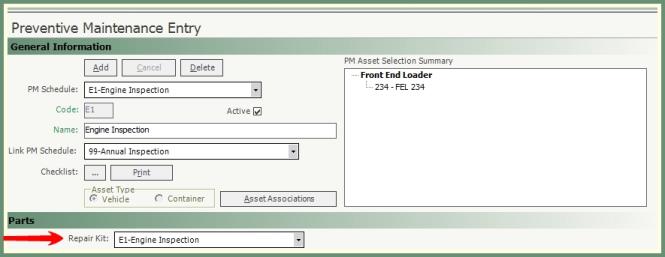
Preventive Maintenance Entry

  1. Select a Repair Kit for the selected PM Schedule.

  • When scheduling the PM from PM Center, the parts associated with the Repair Kit for the selected vehicle will be automatically added to the Repair Order.


Report Center: Repair Kit Report

  1. Select the Repair Kits Report in Report Center>Parts.

  2. Select Asset Type Vehicle or Container.

  3. Select the Vehicle or Containers and Repair Kit to report.

  4. Select an Output.

  • The Repair Kit Report will display the Parts linked to the Repair Kit along with the actual QTY On Hand.